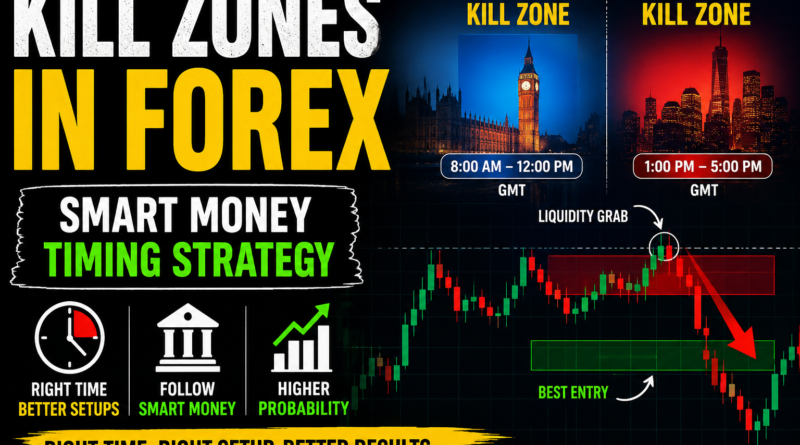
Kill Zones in Forex: Smart Money Timing Strategy That Actually Makes Sense
In Forex trading, timing is often overlooked. Many traders focus only on entries and strategies, but ignore when the market is actually active.
This is where the concept of Kill Zones becomes important.
Kill zones refer to specific trading sessions where market activity increases significantly, especially during London and New York hours. These periods often create stronger moves, better liquidity, and clearer price behavior.
Understanding these time windows can help traders avoid low-quality conditions and focus on more active market phases.
What Are Kill Zones in Forex?
Kill zones are specific time periods during the trading day when market participants, including institutions, are more active.
During these times, the market typically shows:
- Increased liquidity
- Higher volatility
- More frequent price movements
- Clearer directional structure
These conditions are often preferred by intraday traders because price tends to move more efficiently compared to quieter sessions. Why Break of Structure (BOS) Fails and How to Filter It (SMC Price Action Guide)
Main Forex Kill Zones
1. London Session Kill Zone
The London session is often considered one of the most active periods in Forex trading.
During this time:
- Major currency pairs like EURUSD and GBPUSD become highly active
- Liquidity increases significantly
- Strong directional moves often begin
Many traders observe that the London session sets the tone for the rest of the day. London Session Strategy: How to Catch the Real Move Without Getting Trapped
2. New York Session Kill Zone
The New York session is another high-volatility period, especially during overlap with London.
Commonly active instruments include:
- XAUUSD (Gold)
- BTCUSD
- USD-based currency pairs
This session often produces strong continuation moves or reversals depending on earlier price action. New York Session Trading Guide – How to Catch Real Moves in Forex & Gold (Without Overtrading)
3. Asian Session
The Asian session is generally quieter compared to London and New York.
Characteristics include:
- Lower volatility
- Range-bound price movement
- Fewer strong breakout setups
Some traders use this session for range trading or preparation for upcoming sessions. XAUUSD Trading Guide: Price Action, RSI, EMA, FED, CPI & Risk Management
Why Kill Zones Matter in Trading
One of the most important aspects of trading is liquidity and timing.
Even a strong setup can behave differently depending on market conditions.
During kill zones:
- Price reacts more clearly to key levels
- Trends develop with stronger momentum
- Breakouts and reversals become more defined
- Market structure is easier to read
Outside these sessions, price action can appear slower or less predictable.
How Kill Zones Work in Practice
Forex markets are driven by liquidity.
Large participants typically avoid placing major orders in low-volume conditions. Instead, they operate during active sessions where execution is more efficient.
A common market pattern during kill zones includes:
- Price consolidates
- Liquidity builds above or below key levels
- A session opens
- Price makes a quick move to sweep liquidity
- Direction becomes clearer after the move
This behavior is frequently observed in major Forex pairs and Gold. Market Bias in Forex: Institutional Smart Money Guide to Directional Trading (SMC Concept)
A Simple Kill Zone Trading Approach
1. Mark Key Levels Before the Session
Before trading begins, identify:
- Previous highs and lows
- Support and resistance zones
- Liquidity areas
- Session highs and lows
These levels act as reference points during active trading hours.
2. Wait for the Session to Open
Avoid entering trades before the market becomes active.
Early movements can often be misleading and lack confirmation.
3. Observe Liquidity Movements
During kill zones, price often moves toward areas where liquidity is present.
This may include:
- Breaking previous highs or lows
- Spiking into key levels
- Quickly reversing after a move
These movements are commonly part of normal market structure.
4. Wait for Confirmation
Instead of entering immediately, traders often wait for confirmation such as:
- Clear rejection from a level
- Shift in market structure
- Strong directional candles
- Momentum alignment
This helps filter lower-quality setups.
Common Mistakes Traders Make
Entering Too Early
One of the most frequent mistakes is entering before confirmation, often during initial volatility.
Ignoring Market Trend
Trading against strong directional momentum can increase uncertainty, especially during high-volatility sessions.
Trading Every Session
Not every session provides high-quality setups. Sometimes, no trade is the best decision.
Chasing Price
Entering after a move has already occurred often leads to poor risk-to-reward situations. How to Trade Break and Retest Without Getting Faked Out (Simple Price Action Guide)
When Kill Zones Work Best
Kill zone conditions are generally more effective when:
- Market has a clear direction
- Liquidity levels are well defined
- Session overlaps occur
- Volatility is supported by news or economic data
- Higher timeframe structure aligns with intraday movement
When Kill Zones Are Less Effective
There are times when kill zones may produce weaker setups:
- Market is range-bound with no clear structure
- Volume is low
- Major moves already occurred earlier in the day
- Unexpected news creates irregular price behavior
Simple Trading Rules for Kill Zones
- Focus only on active trading sessions
- Wait for confirmation before entering
- Avoid impulsive entries
- Trade in alignment with market structure
- Prioritize risk management at all times
- Accept that not every session will provide opportunities
Best Pairs for Kill Zone Trading
Kill zones are commonly observed in:
- EURUSD
- GBPUSD
- XAUUSD (Gold)
- BTCUSD
- US30
Gold, in particular, tends to show strong movement during New York session activity.
Final Thoughts
Kill zones are not a guaranteed strategy, but rather a timing concept that helps traders focus on more active and liquid market conditions.
When combined with proper analysis, structure, and risk management, they can improve decision-making by avoiding low-quality market environments.
However, consistency in trading still depends on discipline, patience, and proper execution rather than timing alone.
Disclaimer
Disclaimer: Trading forex and CFDs involves significant risk and may not be suitable for all investors. This article is for educational purposes only and should not be considered financial advice.
Written by Shah – Forex trader and market analyst at Forex News 360.
This is best for new traders :
How to Trade Bitcoin for Beginners: A Simple 2026 Guide
What is Forex Trading? A Complete Beginner Guide (2026)
More:
Pingback: Live Forex Analysis YouTube Review – What I Discovered
Pingback: Support and Resistance in Trading Explained (Beginner Guide 2026)
Pingback: XAUUSD Trading Strategy: Price Action, RSI, EMA & Market Factors Guide
Pingback: Institutional Trading in Forex: Beginner’s Guide to How Banks Move the Market